Just in case you have not seen it all yet in 2013, The Lake Mosters of America map!


Just in case you have not seen it all yet in 2013, The Lake Mosters of America map!
This link is from Bonnie at Manhattan Beach. Here are 27 incredible views that you would only see if you were a bird. Click on the image below.

As 2013 nears it’s end, I wanted to wish everyone a Merry Christmas and Happy New Year before I go on vacation! For your viewing pleasure I included this cool 1950’s Christmas map which shows Santa Claus visiting places all over the world.

Enjoy! -mike (Michael Carson, GIS Manager, City of Burbank)
PS – Let me know if you want to host our next SoCalGIS meeting in the new year. Just contact me at mcarson@burbankca.gov .
Intro to GIS Software (GEOG V26) class starts January 6th
Ventura College’s Introduction to GIS Software (GEOG V26) class starts January 6th. This Monday/Wednesday class is 8-weeks long and meets from 7:00-8:50. This course provides a good entry point to those interested in GIS and also provides hands-on skills with ESRI’s ArcGIS 10.2. This course can also fill in gaps for those with some exposure to/experience with GIS.
A follow-up GIS Projects class, GEOG V28 starts right after GEOG 26. You can register for both if you are interested in developing your skills further.
For more information visit the Ventura College GIS page: http://academic.venturacollege.edu/spalladino/geosci/GIS.html
To enroll visit the Ventura College web site: http://www.venturacollege.edu/
Contact Steve Palladino, GIS Program director, spalladino@vcccd.edu for more information.
If you have been thinking about attending one of those coding bootcamps so you can make six figures, take a look at this article for a good analysis of these schools.
In 1785 Congress enacted a law stating that the land in the new States were to be surveyed by a grid system consisting of townships 6 miles square and the said townships were to start at a principal meridian and its base line. These initial points were established as needed across the country.
On November 7th, 1852, Colonel Henry Washington, Deputy Surveyor under contract with the United States Surveyor General of California, completed a four day hike with 12 men to a point he designated and monumented to be the Initial Point for the San Bernardino Pincipal Meridian. Nestled at an elevation of 10,300 feet just west of what is now known as Mount San Bernardino, this Initial Point is both the highest and hardest to reach in the entire country. According to surveyor C. Albert White, it is also the only one that has not been altered over time by man. And, to add to its mystique, this point has one other unusual characteristic feature that makes it more unique – it is not alone.
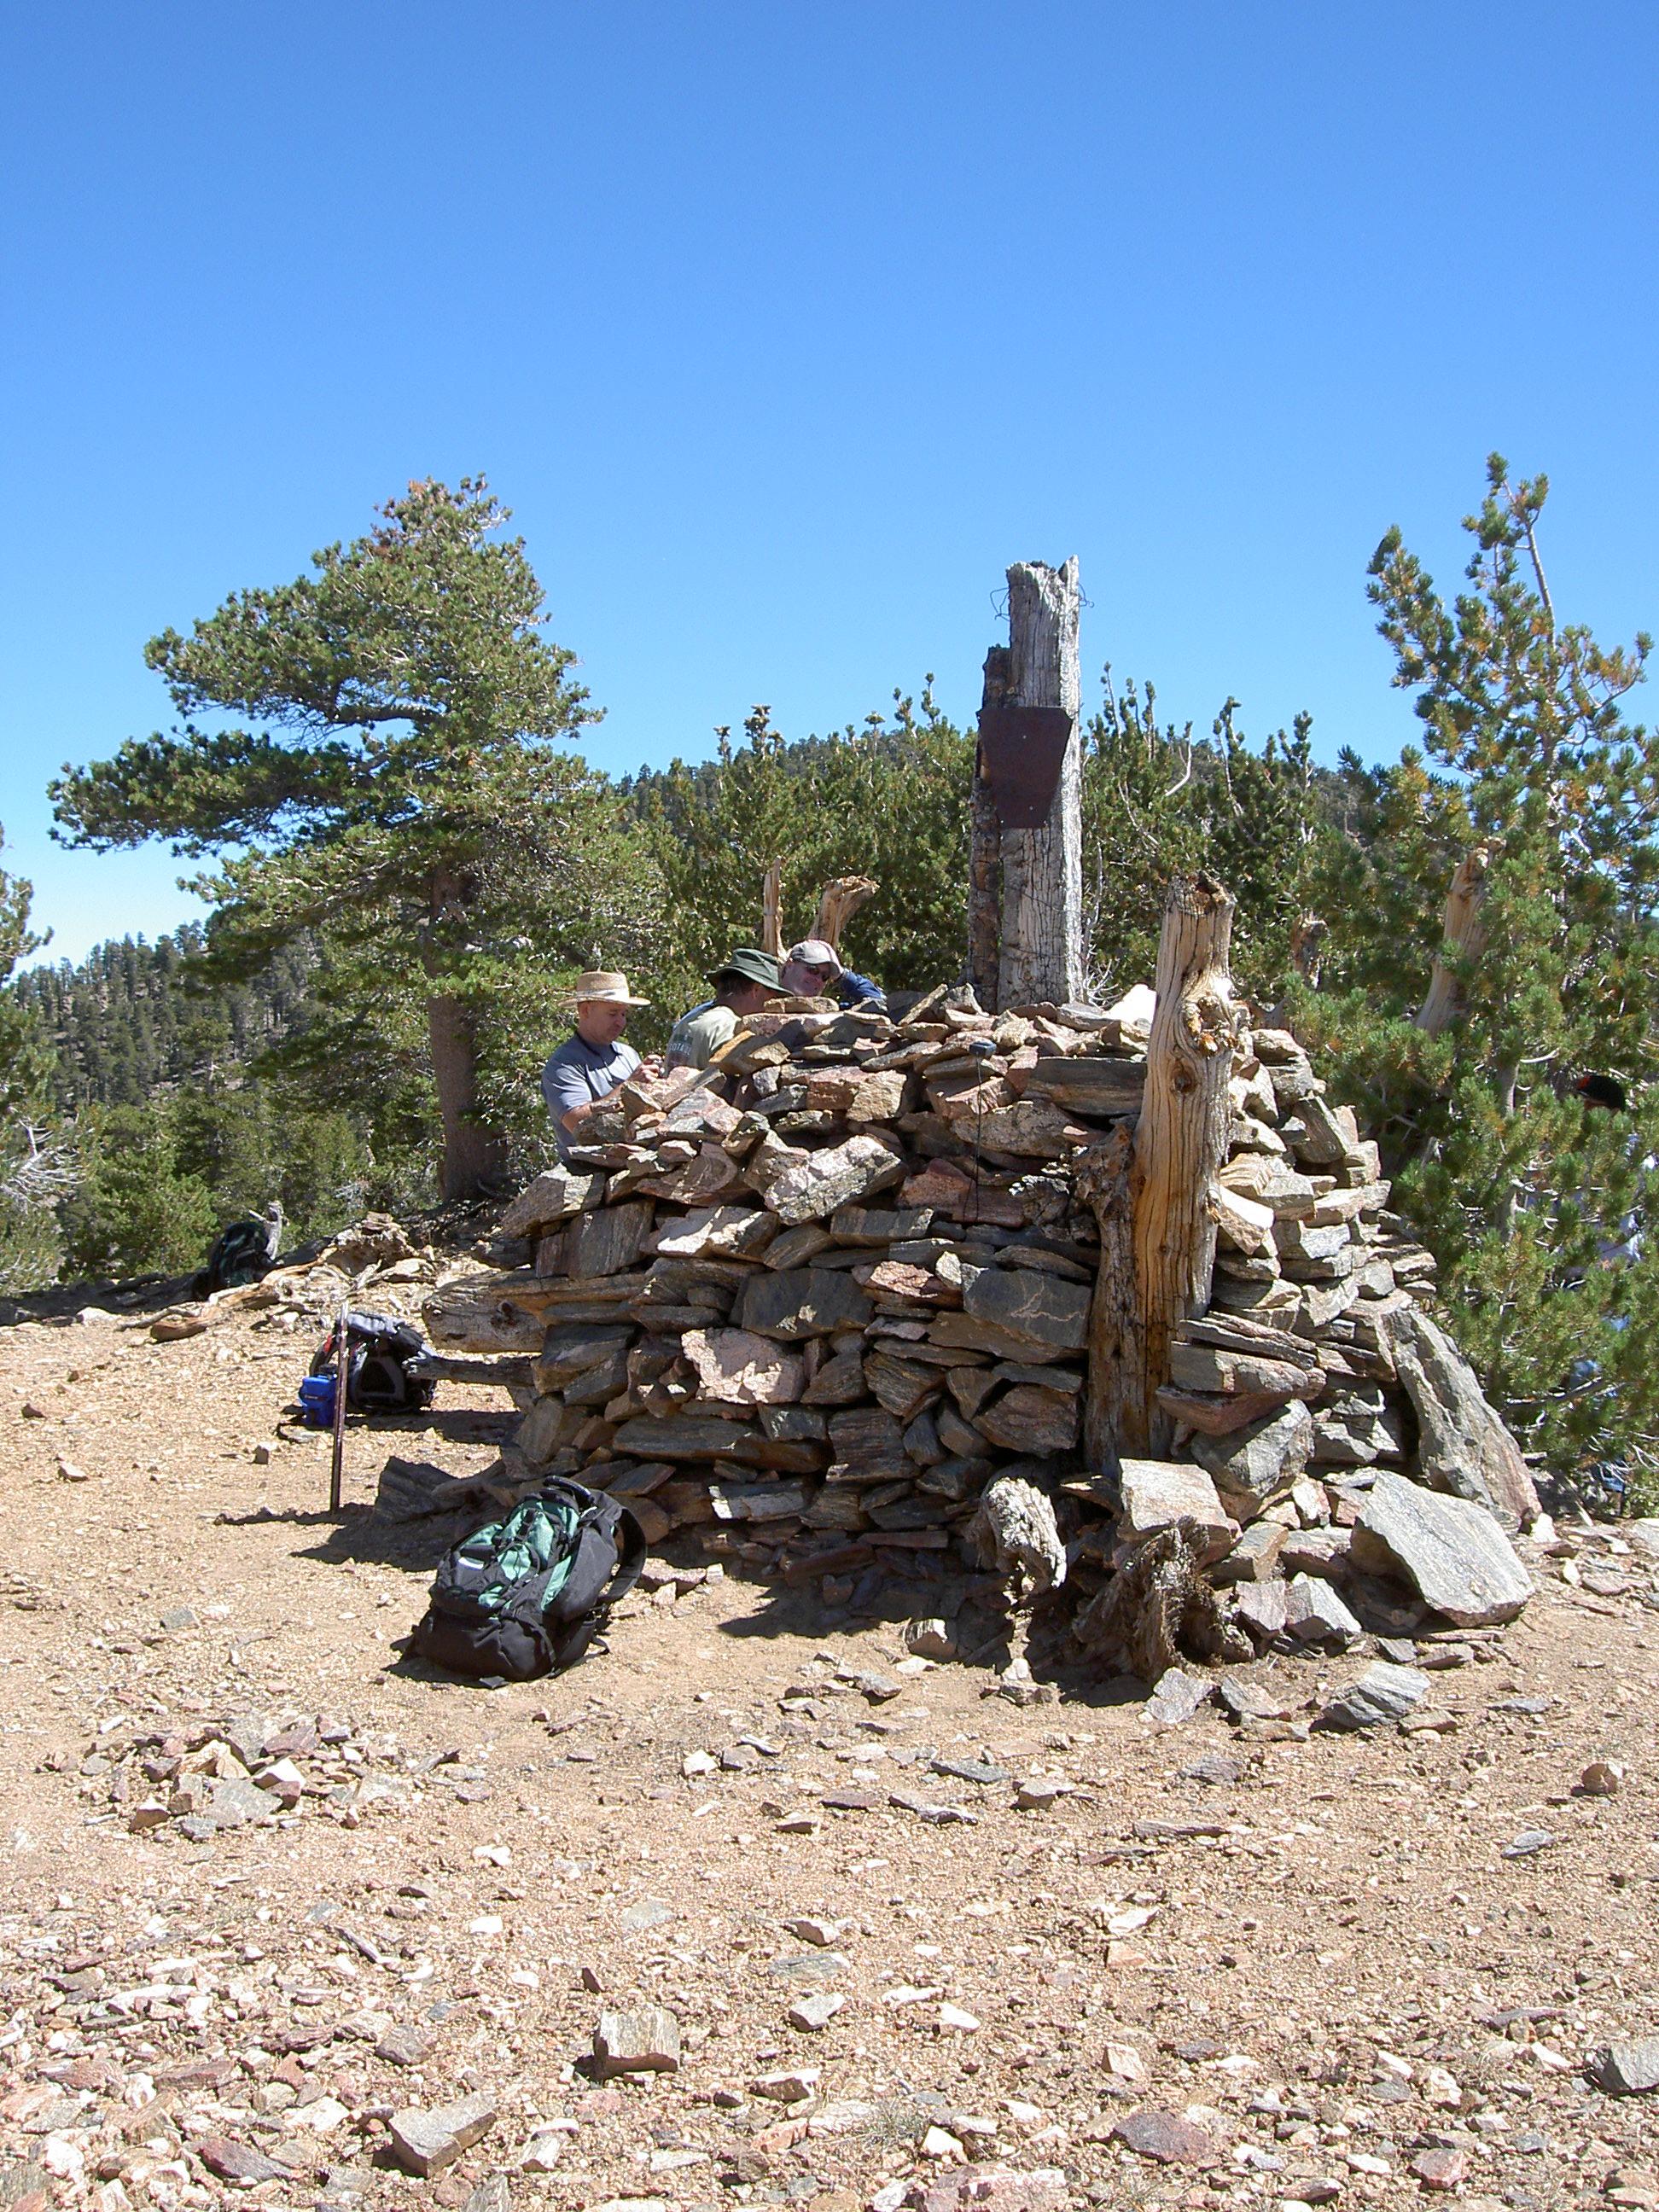
The Principal Meridian Project was started by a group of people devoted to identifying all the base line markers in the country. The group finds the search for meridian markers as interesting as geographers do. Click on the map below to visit their page and learn more about our Initial Point (or points!) in the San Bernardino Mountains.

This is a continuation of my previous post about using the Field Calculator to calc a field to a word position in another field. My whole purpose of the exercise was to use the new field for labeling. But then I thought why create yet another field when you can use what you already have and do the same thing in a labeling expression? So …
I really don’t want the text “Census Tract” in my labels, just the tract numbers. Using Python in a labeling expression should do the trick. First I open the properties of my census tract layer in ArcMap 10.1, click on the Labels tab, and next to my Label Field, click on the Expression button.
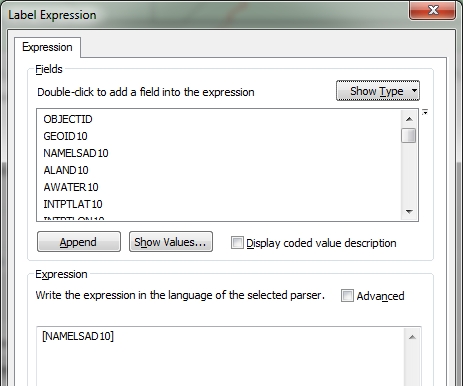
Note in the Label Expression window that my current expression is just the field name NAMELSAD10. What I want to do is strip out the “Census Tract” text that all the records have and just label with the tract name, which is the thrid word in the field’s value. So using the .split() function, similar to my previous post, I build the following expression using the Python parser (make sure to check the Advanced box to use multiple lines of code in your expression):

So what is going on here? When you use multiple lines of Python code, you are required to use a function called FindLabel. This function is used by ArcMap to label your features after the code is run. When you click on the Advanced box in the menu, the fucntion is setup for you in it’s basic form, which is just labeling the feature with the value in the selected field. I added code between the first line and the last line that sets a variable named L to the Python code that takes the value in the NAMELSAD10 field, splits out the words, and extracts the third word. Remember in Python position 0 would be the first word and position 2 would be the third word. Also note that I modified the last line with return, using L instead of the field name. The function will return the value of L, which will be set to the thrid word that I want, which would be the tract number. Press the OK button and you will see the result.

Just like before, but without having to create a new field!
Most coders like to code with as few lines as possible. You could do the same thing by removing the second line setting the L variable, and just manipulate the field value on the return line like so:

Here you cut out the middle man, or cut out setting the L variable, and just executed the .split() function on the return line. Easy and efficient!
Let’s back up a bit. What if I did want the “Census Tract” text in my label, but I wanted each word stacked? That can be done by doing this:

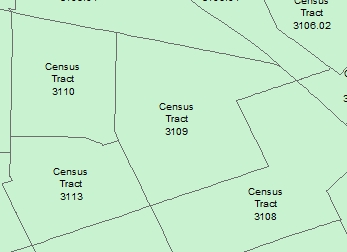
I set three variables, one for each word, then set the final L variable for the labeling. The ‘\n’ represents a new line character, or for us humans a carriage return to start a new line. Using this Python expression results in the following labels:
Now that you know a few of these tricks, you can start doing some fancy labeling of your own data! -mike
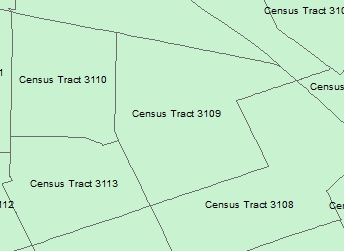
Usually once a year I have a need to calc a field to a word position in another field in ArcMap. For example, here is a field from some census data I downloaded:

Why did they add the text “Census Tract” to all of these? Seems to be a space waster right? All I really want is just the tract number. So what I will do is create a new field, then calc the value to the 3rd word, or tract number, from the other field.
First I create a new field named appropriately TRACTNUM. You simply do this using the attribute table window pulldown > Add field…

Next, I enter the field name, set the type to Text, and set the length to 10.

My tract numbers will not be longer than 10 characters. Press the OK button and the field will be added to the end of the attribute table.
Next, I scroll over to the new field name in the attribute table and right click on it to select the field calculator.

The field calculator appears. I am using ArcMap 10.1, so I select the Python parser, then double click on the NAMELSAD10 field that contains the tract numbers I want to extract, then set the type to String and click on the .split() function. Next in the expression area between () I enter a double quote, a space, and another double quote, then add [2] at the very end. The expression should look like the following:

What this will do is take the text from the NAMELSAD10 field, pass it to the split function which uses the space ” ” as the delimiter to separate the words and then extracts the third word for the TRACTNUM field calculation. In Python, position 0 would be the first word, position 1 the second word, and position 2 the third word, which we want. That is why I used [2].
With everything set in the field calculator, click the OK button. Once the calculation is complete, you will see just the tract numbers in the TRACTNUM field.

Now that I documented this, I will not forget how to do this next year! -mike
The next USGS webinar will be held Dec. 12, 11-12 Pacific. For a better understanding of Earth Explorer, please register and tune in.
EarthExplorer (http://earthexplorer.usgs.gov) provides online search, browse display, metadata export, and data download for earth science data from the archives of the U.S. Geological Survey (USGS). EarthExplorer provides an enhanced user interface using state-of-the art JavaScript libraries, Hypertext Preprocessor (PHP), and the advanced Oracle spatial engine. EarthExplorer is your resource for urban area imagery, Landsat, lidar point clouds, DEMs and other data collected and managed by USGS.
Key features in EarthExplorer include:
• Fast, geospatial search engine
• Map viewer for viewing overlay footprints and browse overlays
• Simple, fast Graphical User Interface (GUI)
• Data access tool to search and discover data
• Textual query capability
• Keyhole Markup Language (KML) export capability to interface with Google Earth
• Save or export queries, results, and map overlay for reuse
• Request on-demand products
• Access to browse images from standard products
• User authentication service for access to specialized datasets and tools
• Access to Landsat Data Continuity Mission (LDCM) quality band data
• Standard product downloads
• User notifications of new acquisitions and available products through subscription services
• Updated software code base supporting JavaScript and PHP
TOPIC: Getting around earth explorer
DATE: Thursday, December 12, 2013
TIME: 11:00 am, Pacific Standard Time (San Francisco, GMT-08:00)
To attend this meeting, you must first register for it. Please click this link to see more information, and register for this meeting.
https://usgs.webex.com/usgs/j.php?ED=192113193&RG=1&UID=0&RT=MiM0
Once you have registered for the meeting, you will receive an email message confirming your registration. This message will provide the information that you need to join the meeting.
5-10 minutes before the start of the webinar, please dial toll free 855-547-8255 or 703-648-4848
Conference Security Code: 30401#
For Help or Support:
Go to https://usgs.webex.com/usgs/mc click Assistance, then Click Help or click Support.
To contact carol ostergren call 1-9162789510 or, email: costergren@usgs.gov
———————————————————–
For help with WebEx:
– Visit https://usgs.webex.com/, click USGS Help (on left)
– WebEx software questions: 1-866-569-3239
– USGS account questions: email gs_help_webinar@usgs.gov
———————————————————–
http://www.webex.com
Thanks for your interest in USGS products and services.
Drew and Carol
Drew Decker
USGS Geospatial Liaison for Pacific Region
NSDI Partnership Office, U.S. Geological Survey
4165 Spruance Road, Suite 200
San Diego, CA 92101
619-225-6430
619-417-2879 cell
619-225-6101 fax
ddecker@usgs.gov
http://liaisons.usgs.gov/geospatial/California/
http://liaisons.usgs.gov/geospatial/Hawaii/
USNG 11S MS 8026 2158
Carol Ostergren
US Geological Survey Pacific Region
National Geospatial Program
3020 State University Drive East, Suite 3005
Sacramento, CA 95819
916-278-9510 (office); 916-278-9546 (fax)
costergren@usgs.gov
http://liaisons.usgs.gov/geospatial/California/
http://liaisons.usgs.gov/geospatial/Nevada/
https://www.facebook.com/USGeologicalSurvey/timeline
