
Welcome back! Last time in Part 2 we configured PostgresSQL on a Linux server. Now it is finally time to create an Enterprise Geodatabase in PostgreSQL.
Keycodes File
You now need to find your keycodes file. This file was created when ArcGIS Server was installed on one of your servers. This file is written to \Program Files\ESRI\License<release#>\sysgen folder on Windows servers and /arcgis/server/framework/runtime/.wine/drive_c/Program Files/ESRI/License<release#>/sysgen on Linux. Copy the keycodes file to a computer that you run ArcGIS Desktop on. You will need access to it when creating the Enterprise Geodatabase.
Create Enterprise Geodatabase Tool
Open ArcCatalog and find the Create Enterprise Geodatabase tool. You can search for it in ArcCatalog or click on the ArcToolbox button to bring up ArcToolbox and it is under Data Management Tools > Geodatabase Administration > Create Enterprise Geodatabase.

Before you fill in the tool, first stop and think of a good database name. Really think about this one. Give it a good name since everyone will refer to it when they connect. You might want to keep the name short too for easy typing. Keep in mind the name cannot start with a number and must be in lowercase because uppercase names are not supported for geodatabases in PostgreSQL.
With the tool open, select PostgreSQL as your Database Platform, enter your Linux server name for the Instance, enter a database name that you want to use, keep postgres as the Database Administrator and enter the password that you set on the Linux server, user sde will be used as the Geodatabase Administrator so enter a new password for it, keep the Tablespace Name blank, and lastly select your keycodes file that will be used to authorize the Enterprise Geodatabase.

With everything set, click the OK button and cross your fingers! If all goes well, you will have a geodatabase in PostgreSQL. Since I turned off background geoprocessing in ArcCatalog, I got a nice status window while the tool was working. Mine took 33.87 seconds to create!

If you get an error, call ESRI support because it should have worked! There might have been a few unforeseen things on your system that has caused the error. If you followed these directions, then you have good documentation to tell ESRI what you did.
Connect As SDE User
With the Enterprise Geodatabase created, create a connection to it using the sde user. The sde user was previously created by the Create Enterprise Geodatabase tool. This will be a good test to make sure you can connect as a user.
In ArcCatalog open the Catalog Tree if it is not already displayed and double click on Add Database Connection under Database Connections.

The Database Connection window will appear. Select PostgreSQL as the Database Platform, enter your server name as the Instance, set the Authentication Type to Database authentication and enter the sde user name and password as well as check the Save user name and password checkbox, and finally select your database name in the Databases pulldown list.

Click the OK button and the sde user will connect to your Enterprise Geodatabase. Note the connection name will show up as a default name “Connection to <your_instance>.sde”.

I would change it to something a little more descriptive since you will be establishing other user connections. I changed mine so I remember that this is the sde user to PostgreSQL on my server named chlgis02.

Go ahead and double click on it. You will notice that there is nothing there. That is because there is no data in there yet. Right click on the connection name and choose Disconnect.
Only use the sde user for geodatabase administration functions. Never use it to create data. That is what other user accounts will be used for. We will now use your sde user connection to create other database users.
Create Database User Tool
Access to an Enterprise Geodatabase is controlled through user accounts. Privileges are granted to user accounts based on the work users need to do in the geodatabase. Once accounts exist and privileges have been granted, users can connect to the geodatabase from client applications and begin working with the geodatabase.
PostgreSQL uses roles to log in to the database cluster and databases. Individual users are called login roles. For all login roles that will own objects in the geodatabase, you must also create a schema in that database. To use PostgreSQL with ArcGIS, the schema must have the same name as and be owned by the login role.
You now need to create a user who can create database objects in the Enterprise Geodatabase. You use the Create Database User tool to add a login role that can create tables, feature classes, and views. The tool creates a login role in the PostgreSQL database cluster, creates a matching schema for the user in the database you specify, and grants USAGE privileges on the new schema to the “public”. Think of public as an implicitly defined group that always includes all roles. Any particular role will have the sum of privileges granted directly to it, privileges granted to any role it is presently a member of, and privileges granted to public.
I like to create a “master” user login that will be used to maintain the data in the Enterprise Geodatabase. Yes you can create multiple users that can create/delete data, but I think that gets messy after a while. I rather have one master user that maintains and organizes all data, and all other users with a few exceptions will only have view/query rights. I like to keep my Enterprise Geodatabase clean which in the end helps my users find data quickly.
Also, keep this “master” user name short. When you create data in an Enterprise Geodatabase in PostgreSQL, it will have a name that will include the database name and the user. For example, if I had a database named “gisdata” and a user named “master”, if I create a parcel feature class named “parcels”, the actual name will be “gisdata.master.parcels” in PostgreSQL, not just “parcels” like you are used to seeing in a file based geodatabase.
Now that you have thought of a user name, open the Create Database User tool from ArcCatalog. A quick way of doing this is connect to the Enterprise Geodatabase as the sde user, then right click on the connection and select Administration > Add User. For my Enterprise Geodatabase named “egdb1”, I will have a user named “gis” to maintain all content.

Click the OK button and the user is created.
Copy Data To The Enterprise Geodatabase
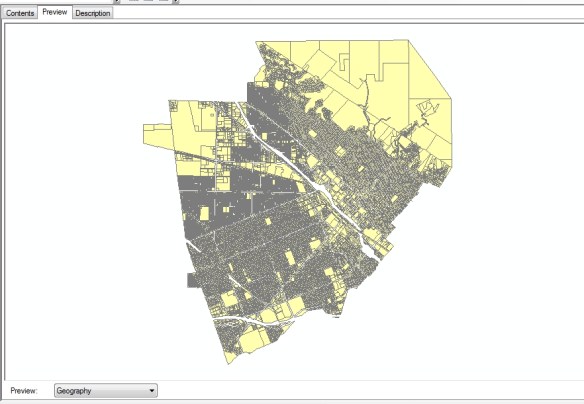
Use ArcCatalog again and establish a new database connection using your “master” user. Once connected, try copying some data to the Enterprise Geodatabase. Here I copied some parcels just for fun:

And they look like this:
Add More Users
At this point you probably want to add more users to the Enterprise Geodatabase. You can use the Create Database User tool again to add more users. Keep in mind that these users will also be able to copy/edit/delete data like your “master” user. However, they will not be able to access any data owned by other users. The data owner will need to give them “permission” to view the data (called SELECT) or edit the data (called INSERT, UPDATE, and DELETE). You can follow ESRI’s help information about that at http://desktop.arcgis.com/en/arcmap/latest/manage-data/geodatabases/grant-dataset-privileges.htm .
If you want to create “view only” users or “edit only” users, you will need to use the PostgreSQL command tools to be able to do that. I will not go into it here, but you can read all about it in the “Create logins to view and edit data” section at http://desktop.arcgis.com/en/arcmap/latest/manage-data/gdbs-in-postgresql/add-users-postgresql.htm .
Final Thoughts
Congratulations on making it all the way to the end! PostgreSQL should be trouble free for you and save you a lot of money too!
Before I wrap this all up, I wanted to share a few more things with you.
If you are new to Linux, this is a great reference book to have: https://www.amazon.com/Linux-Command-Line-Complete-Introduction/dp/1593273894/ .
The PostgreSQL v10 documentation can be found at https://www.postgresql.org/docs/10/index.html . If you ever need support, use ESRI for sure. You can also try the PostgreSQL support at https://www.postgresql.org/support/ .
There are some fine tuning things you can do with PostgreSQL. ESRI has documented some settings here: http://desktop.arcgis.com/en/arcmap/latest/manage-data/gdbs-in-postgresql/memory-tuning-postgresql.htm . I also found this good article about settings here: https://severalnines.com/blog/architecture-and-tuning-memory-postgresql-databases . You make these changes in the postgresql.conf file. Make sure to reboot the server if you make any changes.
When you create user connections in ArcCatalog to your Enterprise Geodatabase, a connection file is saved in ArcCatalog’s working space. You can find the connection files under C:\Users\<your_login>\AppData\Roaming\ESRI\Desktop10.6\ArcCatalog (assuming you are using 10.6.x). The files are named exactly how you named them in ArcCatalog and end in the .sde extension. You can give someone else one of your connection files and they can place it in their same directory (assuming they are using 10.6.x too). Then when they open ArcCatalog, they can just double click the connection, no need to make a new one for themselves. The down side? They don’t know the password to connect since it has been created for them, but maybe that is a good thing.
If you ever find that you or a new user cannot connect to PostgreSQL, you might need to add the computer name or IP address range to the pg_hba.conf file. This happens to me sometimes when I need to connect a new server to the database. If it’s not in the pg_hba.conf file, then it will not connect.
Lastly, the keycodes file you used to create the Enterprise Geodatabase has an expiration date. What is that date? Well, when does your ArcGIS Server license expire? Your Enterprise Geodatabase is no different. It will expire too. You will know it when things stop working, like not being able to view data and select features. When this happens you need to get a new keycodes file. A new keycodes file is generated when you re-authorize ArcGIS Server. Just use the new keycodes file to update your Enterprise Geodatabase using the Update Enterprise Geodatabase License tool. If you are curious when your license expires, open the keycodes file in a text editor and look at the “arcsdeserver” entry. The expiration date is the 4th value on the line. I suggest you update your Enterprise Geodatabase before it expires to save some grief!
That is it. I hope you enjoy your PostgreSQL install. Feel free to add comments and tell me how it went for you. -mike

A quick comment here about upgrading your PostgreSQL version. In this post version 10.6 was installed. Just recently PostgreSQL 10.7 was released. How do you upgrade 10.6 to 10.7? Since that is what they call a “minor” upgrade, it is as simple as issuing the command (on CentOS):
sudo yum upgrade postgresql10*
Issuing that command will download the new PostgreSQL package, shutdown your database, install the new binaries, and start up your database again. I did it and it took less than a minute!
Thanks for this writeup.
Now that the data is in Postgres do you think other clients like QGIS can view the geometry. Perhaps even edit it?
I wonder if a PostGIS instance set up with ArcGIS Server can manage users from both ArcGIS Pro and QGIS 3.x as clients