
Goodbye Oracle, hello PostgreSQL! I’ve decided to get out of the Oracle business and move our Enterprise Geodatabase to PostgreSQL. I’m tired of giving Oracle lots of money each year. PostgreSQL is open source and it is very mature. Though we do not have a dedicated DBA here that knows PostgreSQL, they can learn! And so can I. Besides, ESRI supports it and if something goes wrong, I can get them on the red hotline phone!
Over the past few years, I have been testing PostgreSQL on Windows by installing it with our ArcGIS Server installations and using it to store GIS data used in our map and feature services. I have had only one issue and it was a speed problem when selecting over 10,000 polygons in ArcMap. ESRI confirmed it was a bug. I believe that problem has gone away, so now is a good time to move to PostgreSQL. But just to be sure, we will be running both Oracle and PostgreSQL in parallel for a few months.
NOTE: To be able to install an Enterprise Geodatabase in PostgreSQL, you must be running ArcGIS Server (enterprise addition) somewhere. You need the keycodes file that was created with it to authorize the geodatabase. You will also need the st_geometry.so file that was created when you installed ArcGIS Desktop 10.6. More on that later.
Decisions, Decisions
I decided our PostgreSQL install will be on a Linux server (saves me even more money not paying Microsoft for Windows Server). The Linux flavor we use here is CentOS 7, which is the open source version of Red Hat Enterprise Linux Server 7 … I save even more! ESRI supports CentOS as long as the version provides full binary compatibility with an equivalent supported Red Hat version.
If you head on over to ESRI’s PostgreSQL database requirements for ArcGIS 10.6.x (http://desktop.arcgis.com/en/system-requirements/latest/database-requirements-postgresql.htm), you will see the latest version they support and certify is PostgreSQL 10.3, however they will support newer minor versions, so anything 10.x. The latest version 10 of PostgreSQL is 10.6 (not to be confused with ArcGIS 10.6, just a coincidence), so that works perfectly.
With that being decided, I asked our network group to setup a CentOS 7 Linux server with 4 processors, 16gb of memory, and at least 100gb of space on the root directory. It will be a virtual server so we can just blow it away if I totally mess up or things just don’t work out.
Connection Software
You will need software to connect to the Linux box as well as the PostgreSQL database for admin functions.
The first one you will need is PuTTY (https://putty.org/). As the site explains, PuTTY is an SSH and telnet client. You will use this to connect to your Linux server, basically opening up a window for you to login and start typing commands! I downloaded and installed version 0.70 64-bit version on my Windows 7 machine.

The other software you will need is WinSCP (https://winscp.net). You will use WinSCP to copy files to the Linux box. I downloaded and installed the lastest version 5.

Connecting to the Linux Server
Startup PuTTY, then enter your server’s name, use port 22, and connection type SSH.

Click the Open button to connect, a window will open to prompt you to enter your login and password. Once you are in, you will be left at a cursor prompt in your home directory. Your view may differ.

I guess my IT Department will be watching my shenanigans! Try a few of these commands to check out your system:
pwd (lists what directory you are in)
ls -laF (lists all files and directories in the current directory)
lsb_release -a (lists current version of Linux)
free -h (lists current memory)
df -h (lists all the drive capacities)
top (displays Linux processes that are running, enter q to quit)
Installing PostgreSQL
Now it is time to install PostgreSQL. To do this, we will grab the latest copy from the PostgreSQL Yum Repository for the Red Hat family Linux. Go to the PostgreSQL download page for Red Hat (https://www.postgresql.org/download/linux/redhat/). On the website, I select the 10 version, CentOS 7 platform, and x86_64 architecture. Note it then lists the commands that you need to issue at the Linux prompt.
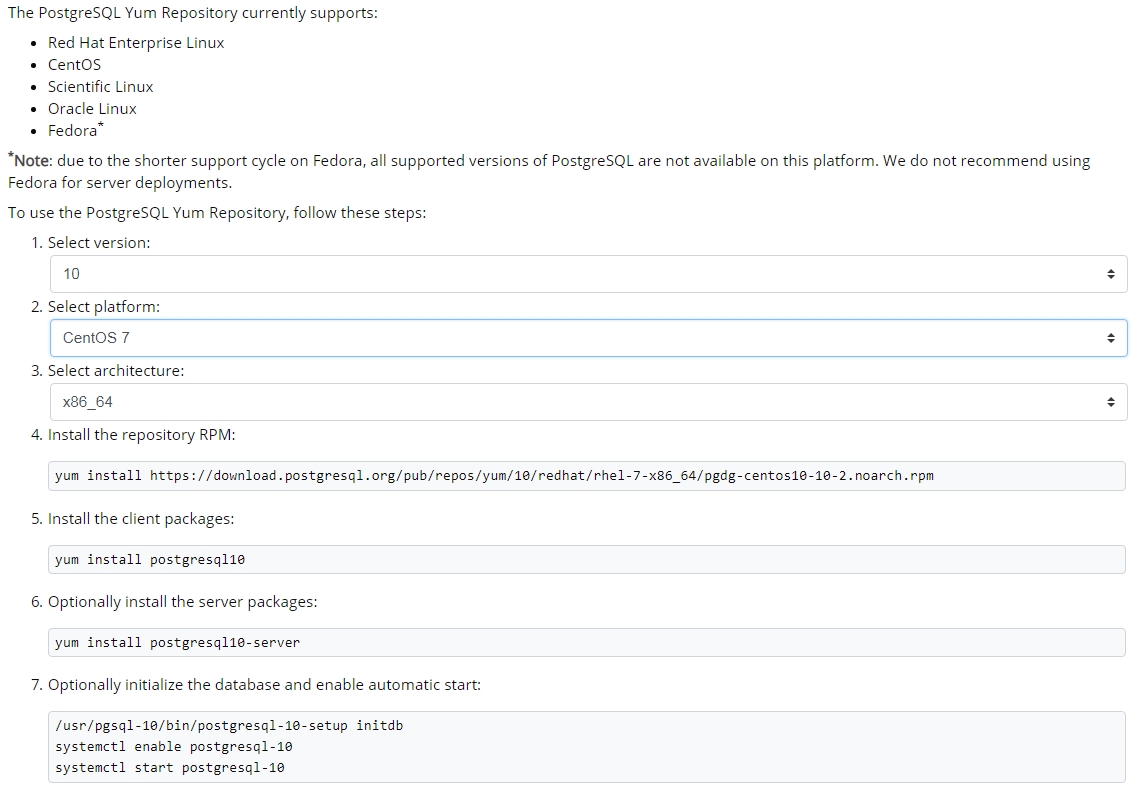
Just follow the directions to install PostgreSQL on your machine using the commands in steps 4 to 7. Do note you might have to use the sudo command before the yum command syntax to install as superuser (aka root user). I had to do this.
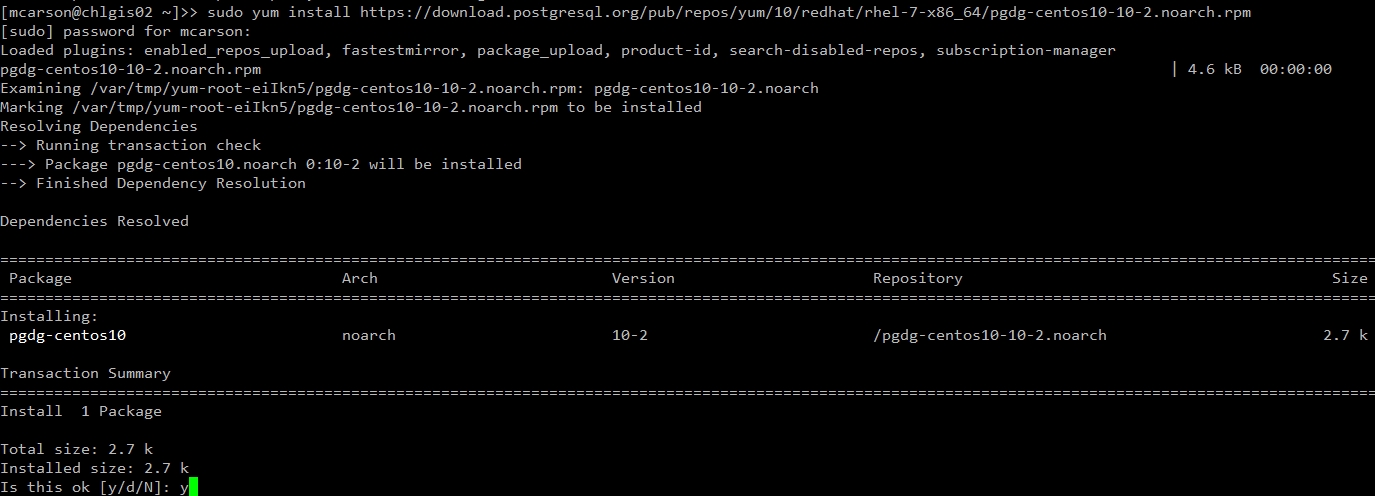
Make sure to answer y when the install asks. If you cannot install, ask your system admin to give you sudo rights.
I also had to use sudo for the step 7 commands.

You also need to issue two commands for post-installation. This will allow PostgreSQL to automatically start if the server were ever rebooted. You will probably have to use sudo here as well.

Now verify your installation by connecting to the PostgreSQL database server as user postgres and use the psql tool to list the server version.

Congratulations! You have successfully installed PostgreSQL 10.6!
There still are a few more things that must be done before you can create the Enterprise Geodatabase. That we will tackle in Part 2!

AWESOME sharing! Even if I don’t have to deal with database at this point I still enjoyed this post. A good tech post should be like this!